Admin
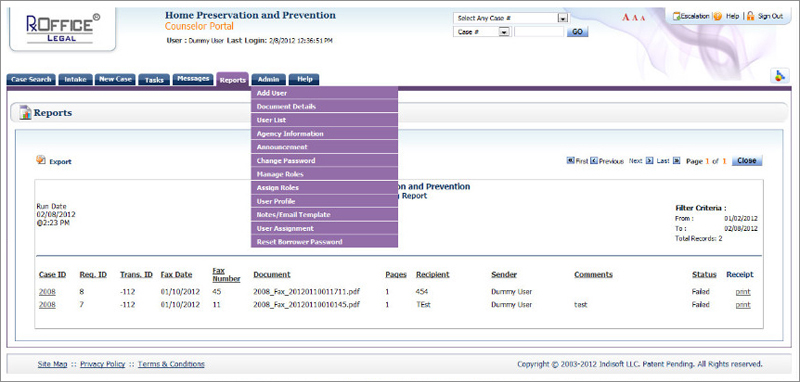
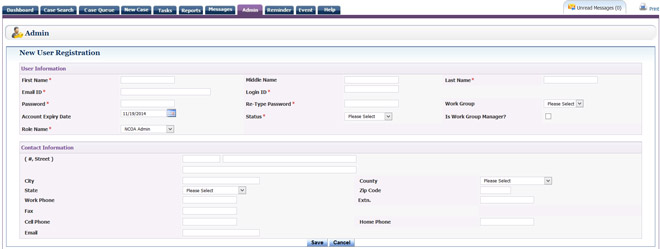
Only the System Administrator can create a new user. Enter the new user information in the screen as seen below and then click the Save button .
For the user to see the current Counselors using the site, click the Admin Tab -> User List and the following screen appears
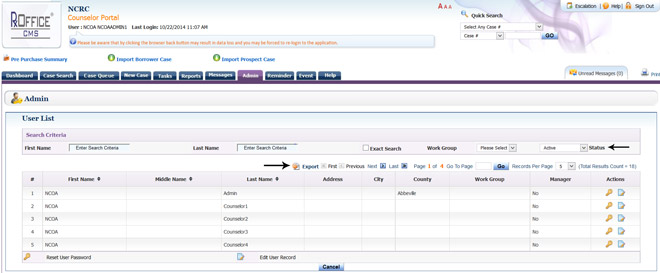
This feature also helps to see which Counselors are currently inactive and cannot use the site. To find out, just choose inactive from the status drop down and then a list of all the inactive users will appear.
In addition, the Counselor can export the users list for future reference in certain formats such as a PDF, XLS, CSV, WORD, or HTML, just by clicking on export and then selecting the format type from the list.
This screen shows detailed information about the Counselor and contact information for that Counselor.
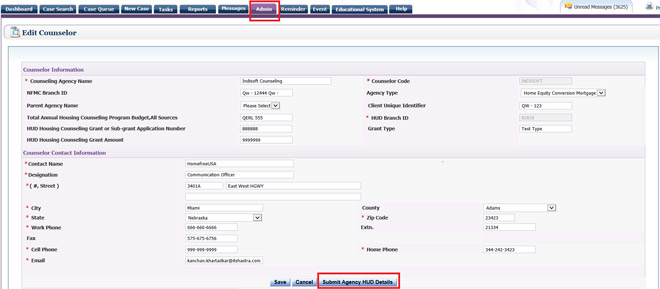
The 'Submit Agency HUD Details,' button is used to submit agency information to HUD. Once the information is updated, the user clicks on the button and the information will be submitted to HUD. It is part of the 2015FY HUD9902 requirement. If the 'Submit Agency HUD Details' button is disabled on the screen, this means that the information is already with HUD and no other action is needed by the Counselor.
To submit the Agency HUD Details click the button and the below screen appears where the Counselor enters their HUD details and then clicks the Submit button .

Counselors will be able to create and save new announcements to notify the other Counselors within their agency of any news and/or updates. To access this feature, click the Admin Tab-> click on Announcement and the User will be able to read the current announcements or click on New Announcement to create a new one.
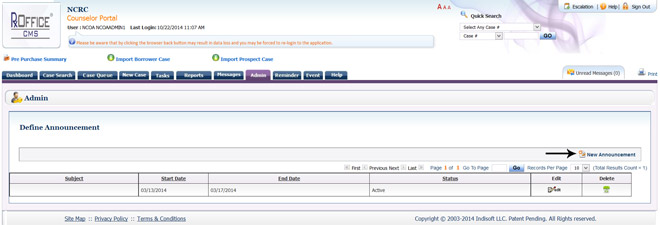
Once the New Announcement button is clicked, the below screen appears:
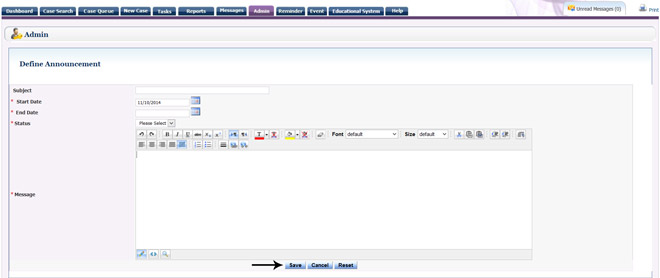
To create the new announcement:
Enter the Subject
Enter a Start Date
Enter an End Date
Select a Status from the drop down menu
Enter the Message
Click on the Save button
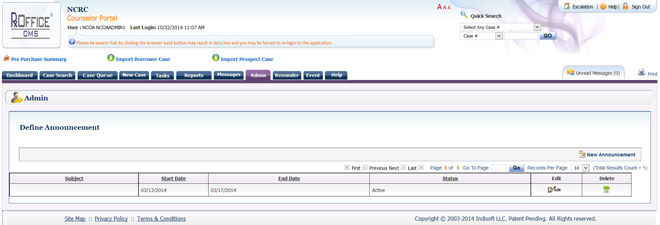
After the new announcement has been saved, the User will be taken back to the main
Announcement screen as seen below:
The change password feature allows Users to change their login passwords. To find this, click the Admin Tab -> select Change Password to see the below screen:
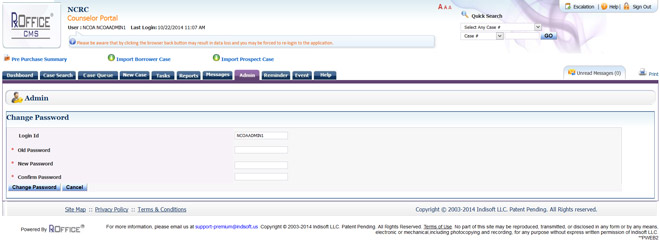
- Enter the old password
- Enter the new password
- Reenter the new Password in the Confirm Password field
- Click on the Change Password button to update the information
The Roles and Privileges feature allows the System Administrator to create and manage new roles and privileges for Users. To find this, click the Admin tab -> select Manage Roles to see below screen:
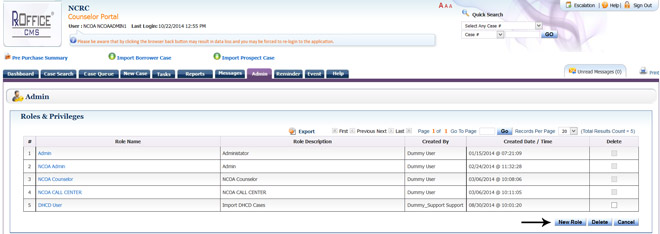
To create a new role in RxOffice®:
- 1. Click on the New Role button
- 2. Provide Role Name (required) and Role Description (optional)
- 3. Click on the module/role menus and select the corresponding privilege for each role

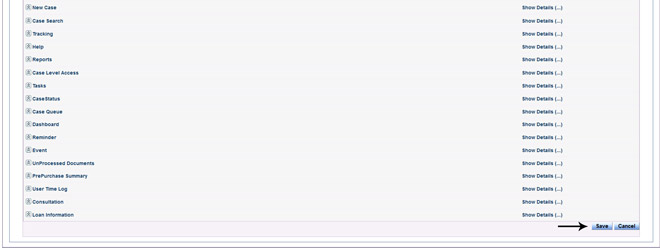
- 4. Once completed going through each role, click on the save button
- 5. Now the new role is saved and will be seen on the main manage roles screen
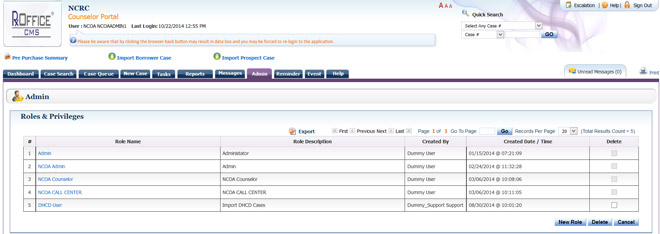
Once the role and privileges have been created, the System Administrator can assign a certain role to the new user as seen below.
To assign a role to a new user, just click on the user's name and the screen will appear:
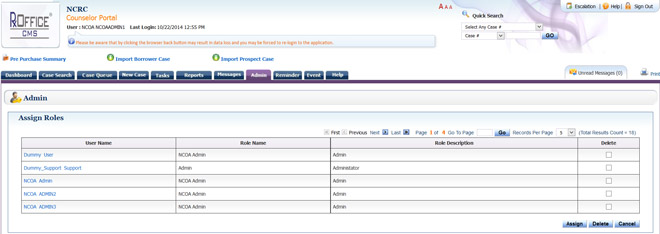
To assign new role to a User:
- 1. Click on Users Name
- 2. List of Roles under Users Name appears as seen below:
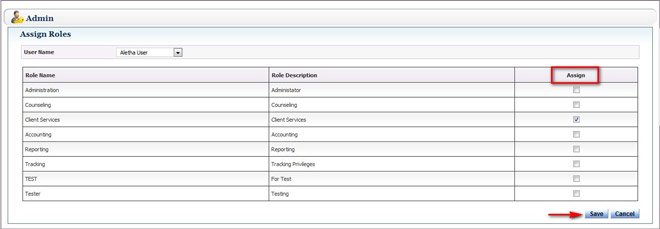
- 3. Check box under Assign column of the role to be assigned to the User
- 4. Click on the Save button
If the user is assigned the role of Admin, then that user has access to everything on the portal and can see all the assigned jobs, case queues, and work group hierarchies within their agency.
User ProfileThis feature allows the Counselor to update their contact information in the portal and once the information has been updated on the screen, click on the Save button:
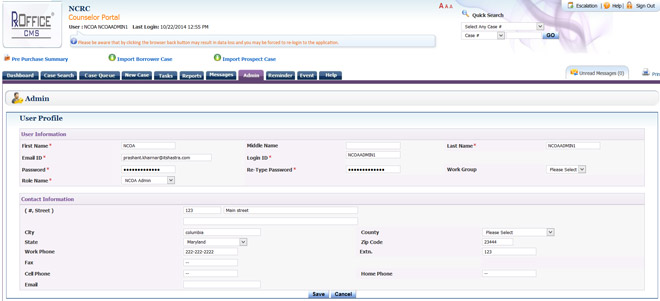
For the user's role, having the privilege "Manage Workgroups" can be found under the Admin tab, so the admin can create and maintain the different groups and update any information regarding those specific groups.

When the user clicks on the New Workgroup button at the bottom of the Workgroups screen, the Add Workgroup window appears, so the admin can make a completely new group and then save it:

After the information is saved, then the new workgroup will be added to the current list and the Admin will be taken back to the main Manage Workgroup screen.
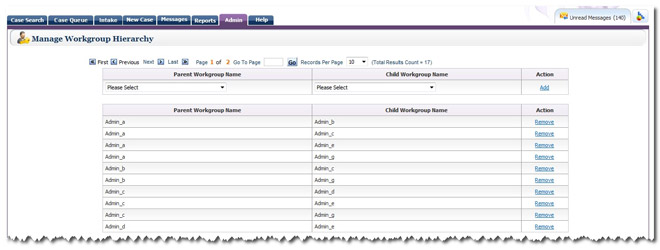
Manage Workgroup HierarchyUser can add the Parent-Child relationship in the "Manage Workgroup Hierarchy" as seen below. The Parent-Child relationship means that the main workgroup would be called the "Parent" and any second or third group would be considered the "Child," which is an additional workgroup.
The main user has the right to "Manage the Client" from the Admin tab. The Manage Client feature shows the number of cases against a Borrower. Also this feature allows the user to search for a certain Borrower based on particular search conditions

NFMC Import Case
Import Duplicate NFMC Cases
DHCD Import
HCO Import
Notes/Email Template
The feature, Notes/Email Template is located at the Admin tab, which provides Users the ability to create and save different Notes and Email templates that can be used for all or specific contacts. To create a new template, select Notes/Email Template and the below screen appears:
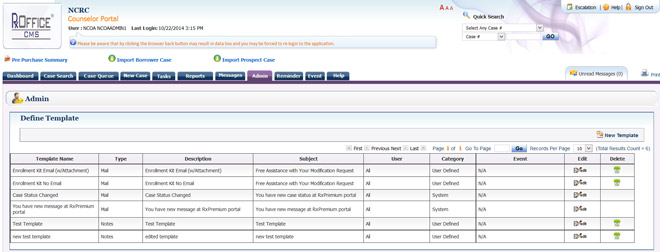
To create a new notes/email template, click on the new template icon and the below screen appears:
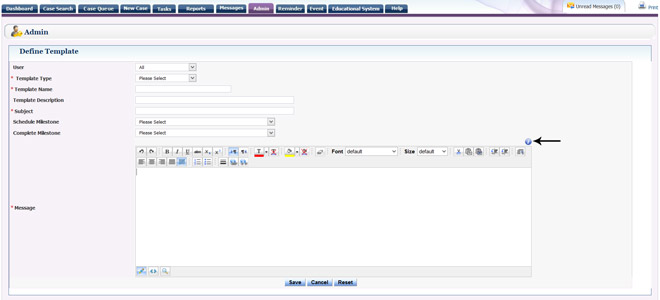
1. Select User from dropdown menu, if the template is for a specific User.
2. Select the specific Template Type
3. Enter the Template Name
4. Enter the Template Description (optional)
5. Enter the Subject
6. Select from dropdown menu for Schedule Milestone and Complete Milestone (optional)
7. Enter the Message
8. Click on Save
The information icon lists the different replacement values, so instead of typing specific information for each and every email, the User can select a replacement value and then when the message is sent out, the value is replaced with the Borrower's name or any other key information.
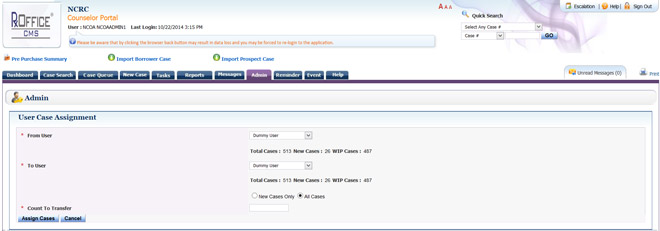
User Case AssignmentThis feature allows the Counselor to reassign either new cases or cases in progress between two different Counselors. Just select the User from the From User drop down menu whose cases are being reassigned and select the other User from the To User drop down menu who will be getting these cases. Once the Counselors have been selected, the total number of cases that need to be reassigned will need to be entered in the Count to Transfer box and then the Assign Cases button will need to be clicked.
The Search Borrower screen shows that the Admin can search for a certain user who needs their password reset. Below shows that the Admin will be able to search for a certain Borrower with their Login ID.

The Reset Borrower Password screen allows the Admin to select the specific Borrower whose password needs to be reset and once the Borrower has been selected, the User clicks on the reset password button at the bottom of the screen. Once clicked, the Borrower's password has been reset.


