Unprocessed Documents
The unprocessed documents section shows documents that have been sent directly to the portal via email, but have not been processed and then uploaded to any specific case. To access this screen, click on Unprocess Documents on the dashboard.

Once clicked, the below screen will appear, which lists all the documents that still have not be assigned to a case.

To process a document and assign it to a case, click on the next button and the following screen will appear:
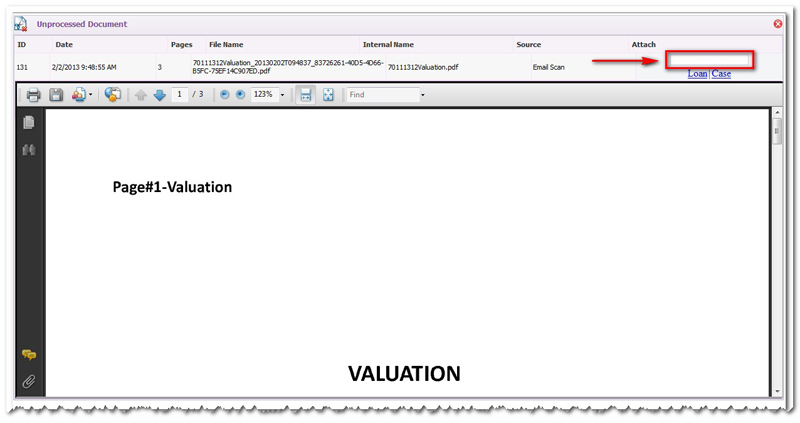
In the box above, enter the loan number or the case id and then click on either the loan or case buttons depending on what number was entered and the user will see below:
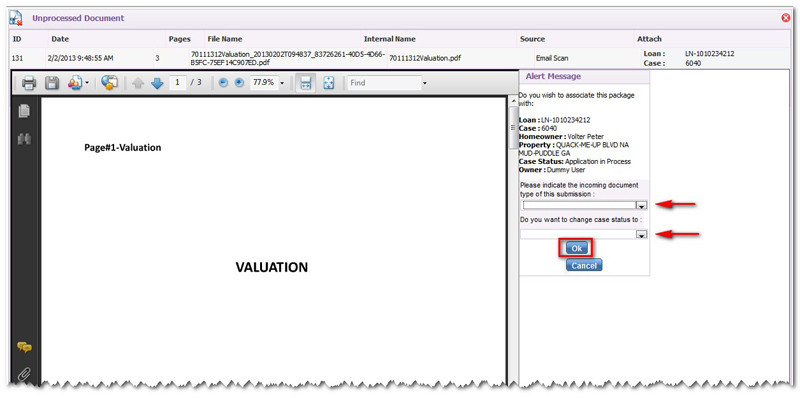
The alert message box appears at the right of the document, which helps the user to not only see the document that is being processed, but also where the document should go in the case. Once the type of submission and the case status change have been selected from the drop down menus, then click on ok.
The document has now been processed and uploaded to the specific case as well as the status of the case has been changed for the next step in the review process.
Bulk Printing
Bulk Printing provides the user with the option to print or email a batch of documents at the same time, instead of one at a time, which makes this feature more convenient. To access the bulk printing screen, click on bulk printing on the dashboard and the below screen appears:
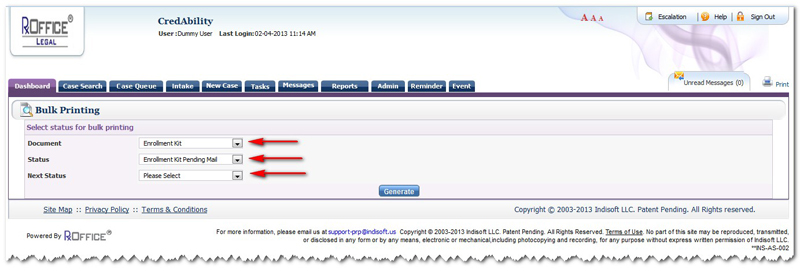
The user will need to select the status from each of the drop down menus and then click on Generate Button. Once generate is clicked, the user should see the below screen:
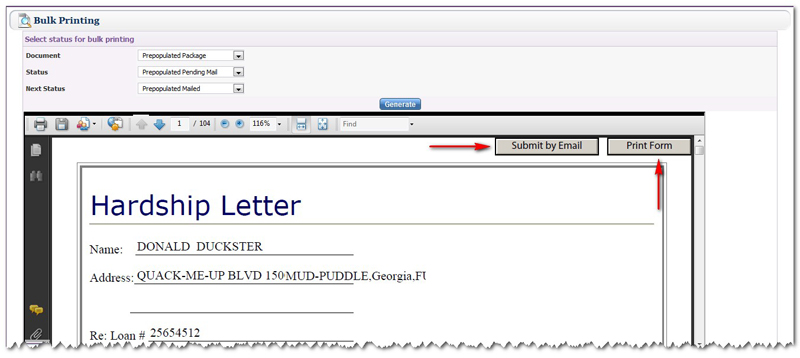
The user now sees the documents and is given the option to either email them or print them. The user can click on either submit by email or print form buttons or click on either the print or email icons located below next status.
Document UploadsThe Document Uploads screen is where all the important documents need to be uploaded and saved for the case.
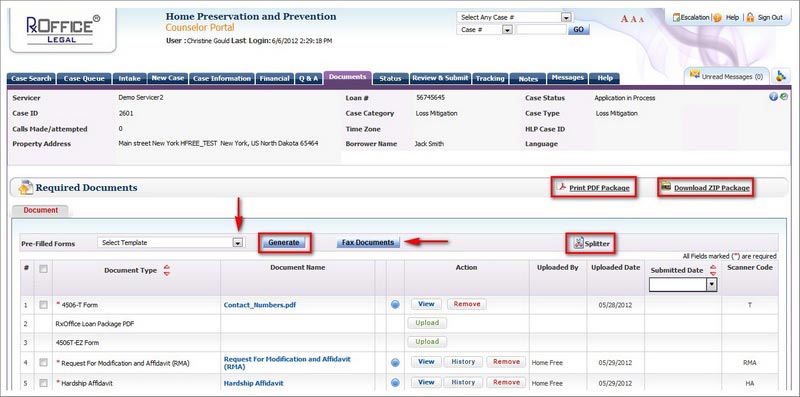
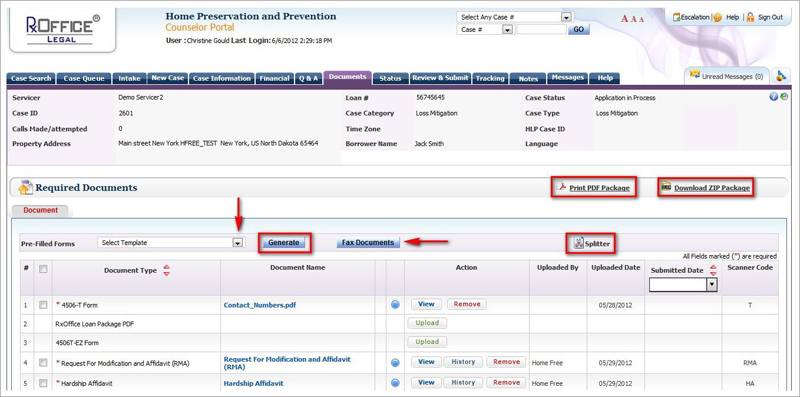
Once the case has been submitted, the Servicer checks this section to review the important documents and to make sure nothing is missing. As the Servicer is reviewing this section and notices something missing, then the Counselor will be told.
The important documents that need to be uploaded to the case are labeled with a red asterisk (*), which includes the Hardship Affidavit and the Dodd Frank Certification, so the Counselor knows, which documents are needed from the Borrower. Within this feature, the Counselor has the option to either create documents such as RMAs, Form 710, or Hardship Affidavit has a pre-filled form, fax documents with a dedicated fax number (only available with Model 4096), print the entire pdf package, download a zip package, or use the splitter feature.
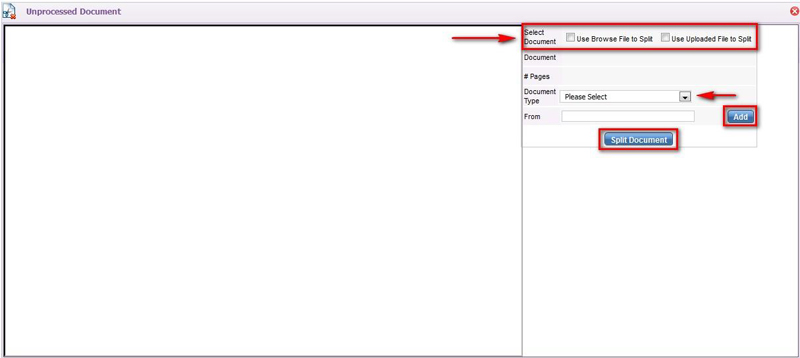
The splitter feature as indicated by the scissor icon in the earlier picture, makes it easier for Counselorss to upload many supporting documents at once and then split them into the different document types. Once the splitter feature icon is clicked on, the Counselor should see:
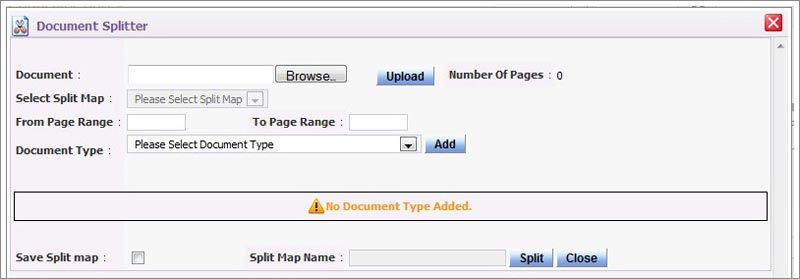
The Counselor can then browse the supporting and then divide them into different page ranges as well as select the document type where the documents are to be added. Once the fields are set, click theAdd button and then the documents will be automatically placed where needed.
Splitter/ Annotation
The splitter feature allows the user to combine several uploaded documents as one and then save them as a specific document for the case.
To access this feature:Click on the case id on the dashboard:Select
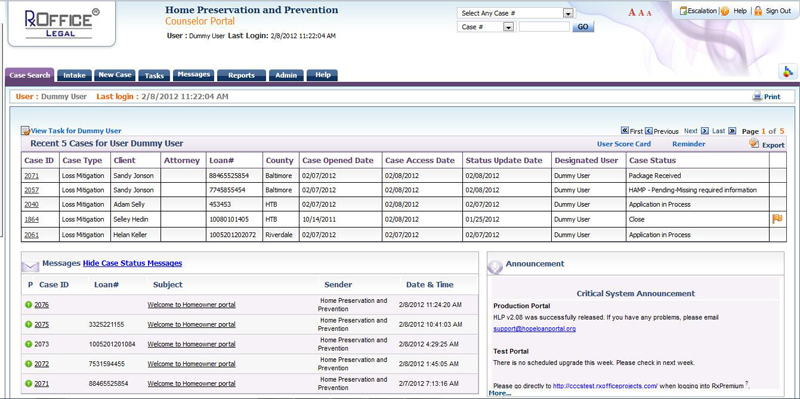
Select the Supporting Documents under the Documents tab:

Select the specific way to split document: browse or upload
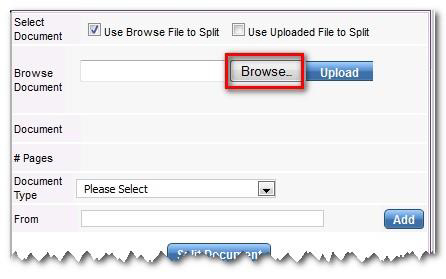
If 'Use Browse File to Split' is selected then click on the browse button and select saved document from computer and then click on the upload button:
After document has been uploaded, then the document name and page number will appear

From the Document Type drop down menu, select the document type that the new document will be saved as for the case. And enter specific page numbers into the box located under the Document Type drop down menu:
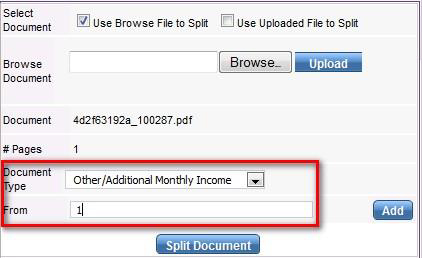
There should be more than 1 page uploaded for this feature to work
Enter the page numbers, i.e. 1, 2, 3 or 1-3 or 1, 3, 5 and then click on the add button
Once all pages have been added, a list of documents and page numbers appears:
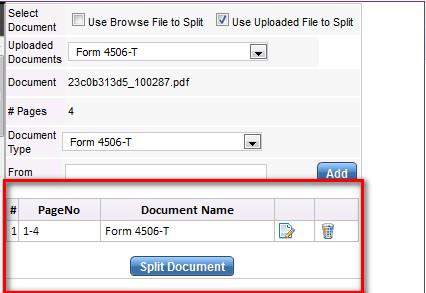
Once all page numbers have been selected as well as a document type, click on split document
Pages will then be automatically pulled and saved as selected document to the specific case
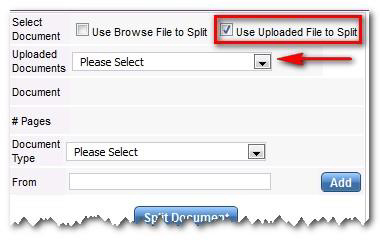
If 'Use Uploaded File to Split' is selected then click on the uploaded documents drop down menu and select document:
Just like the 'Use Browse File to Split' option, once the document has been selected, then the document name and number of pages will appear:
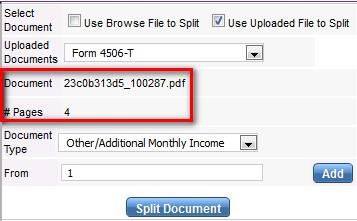
From the Document Type drop down menu, select the specific document that new document will be saved as for the case.
Enter specific page numbers in the from box located under the Document Type drop down menu.
Enter the page numbers, i.e. 1, 2, 3 or 1-3 or 1, 3, 5 and then click on add:
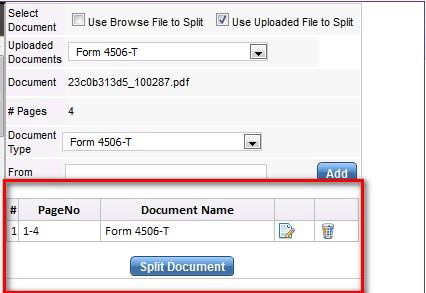
Then a list of documents and page numbers appears Once all the pages have been selected as well as document type, click on split document Pages will then be automatically pulled and saved as new document to the specific case
Annotation FeatureThe Annotation feature allows the user to make edits to a specific document that has already been uploaded to a case and then the changes will save, so the User will not have to remove and then upload a new document.
Once a document has been uploaded to a case, an Annotation button will appear under the Annotation column on the Supporting Documents screen as seen below:

When the User clicks on the Annotation button, the document opens as seen below:
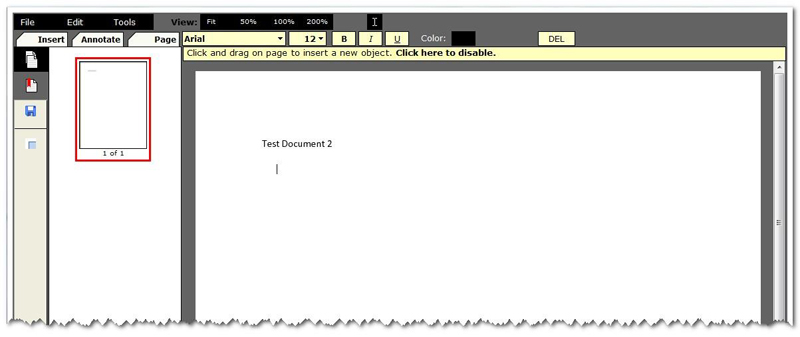
Once the changes or updates have been made to the document, click on the save icon:
Once the Annotated document has been saved, the name of the original document will be changed as seen below and the original document will be saved under the history button:

To view the new document, click on the view button and an alert message appears below, which depends on the browser you are using:
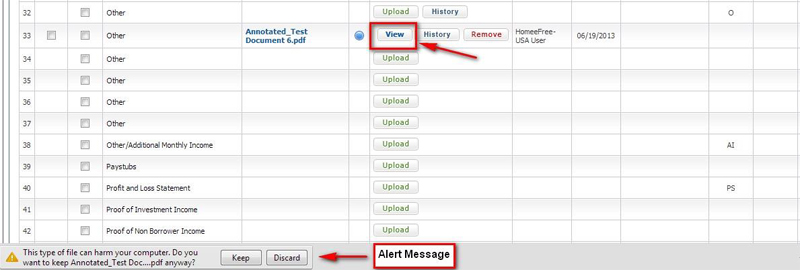
If user selects the keep button, then the document will appear as seen below:

And then click on the new Annotated document, which will open:


