Messages
IntroductionThe RxOffice® Premium portal provides Counselors the opportunity to correspond with Servicers, Investors, or their Clients about the case, safely and securely.
Creating a Message TemplateThe Notes/Email Template which is located under the Admin Tab of the User's dashboard, provides the Counselor a way to create a Notes/Email template and save it without having to type the same email or enter the same notes over again. Also the template can be created and saved for a specific contact such as a Servicer or a Borrower.
To access this feature, the Counselor selects Notes/Email Template from the Admin Tab and sees the screen below:
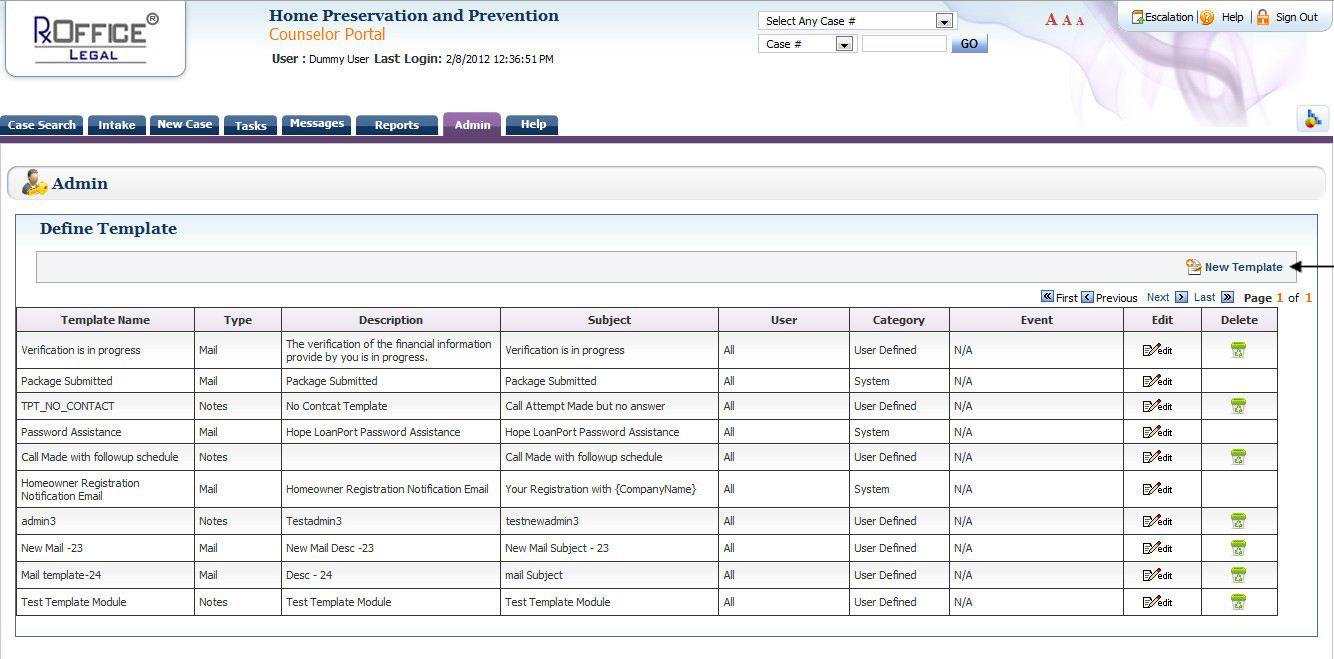
The Counselor will notice templates that have already been created and saved by the system, which could be used. Otherwise, the Counselor could create their own templates by clicking the New Template link as seen above.
When the link is clicked, the following screen appears:
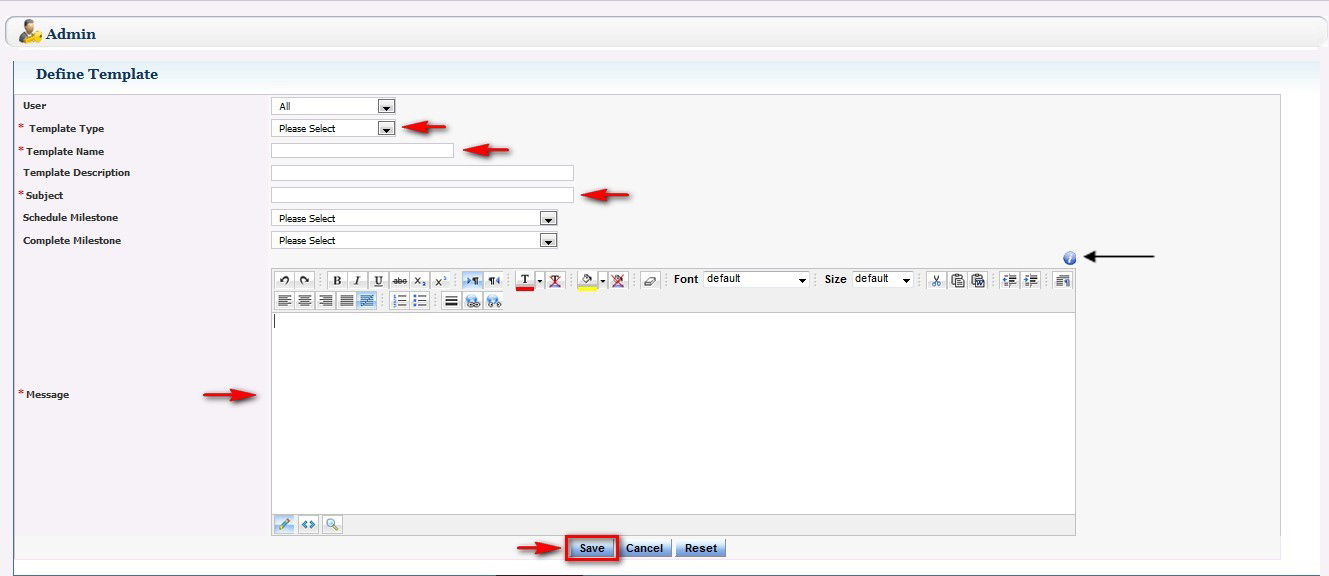
At this stage, the Counselor would need to select Email from the Template type drop down menu, enter the name of the template, the subject, and then the message.
Also the 'I' icon or the information icon located on the upper right hand corner of the message box as indicated by the black arrow, provides a list of the different fields as seen below, which Counselors could include in their messages to Homeowners. These data elements make it easier and less time consuming for Counselors when composing new messages in the Portal.
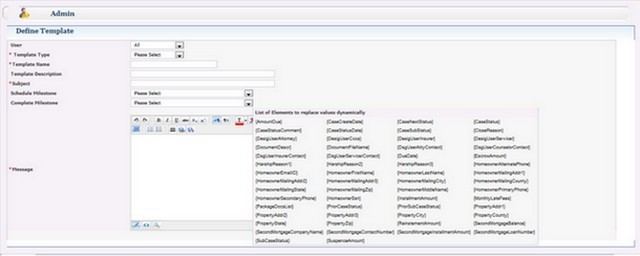
When creating a new email template, the Counselor would need to copy and paste the data element into the message box. And once the rest of the message has been typed then the Counselor clicks on the Save button, so now each and every time a message is being composed to a specific Homeowner, that specific portion of the message will be replaced by the data element and then the specific information will be seen by the Client, after the message has been sent.
For example, if {Homeowner First Name} {Homeowner Last Name} data elements have been copied and pasted to the email template and saved, the Counselor will no longer have to type the Homeowner's full name each and every time, instead when the specific email template has been selected and then the composed message has been sent, the Homeowner's full name will appear once the message has been received by the Client.
Once the information has been entered, the Counselor would need to click the Save button and the Counselor will be taken back to the main Define Template screen where the new template, which has been created is now saved in the system.
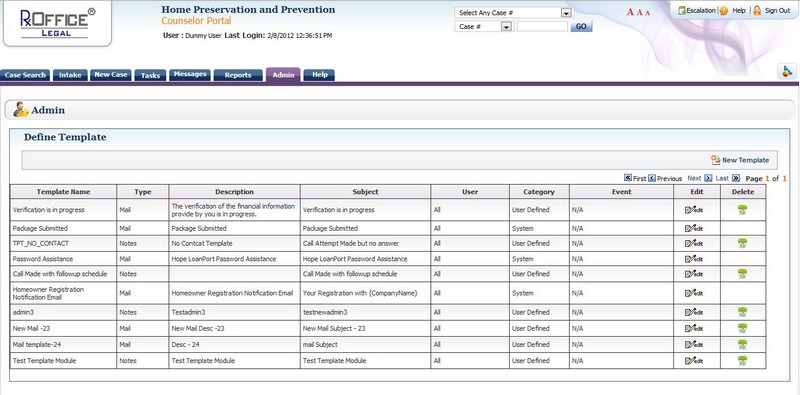
After the new template has been created and saved, if the Counselor needs to make any changes to the template the User clicks the edit icon under the edit column next to the specific template, makes the changes, and clicks the save button. Also if needed, the Counselor has the option to delete the template as well by clicking on the delete icon under the delete column next to the template to be deleted. Also the newly created and saved email template could be accessed at any time by the Counselor when a message needs to be sent in the portal to either the Servicer or the Borrower.
Messages TabThe Messages tab found on the dashboard of the case shows the list of messages that were received by the Counselor as seen below in the case's inbox:
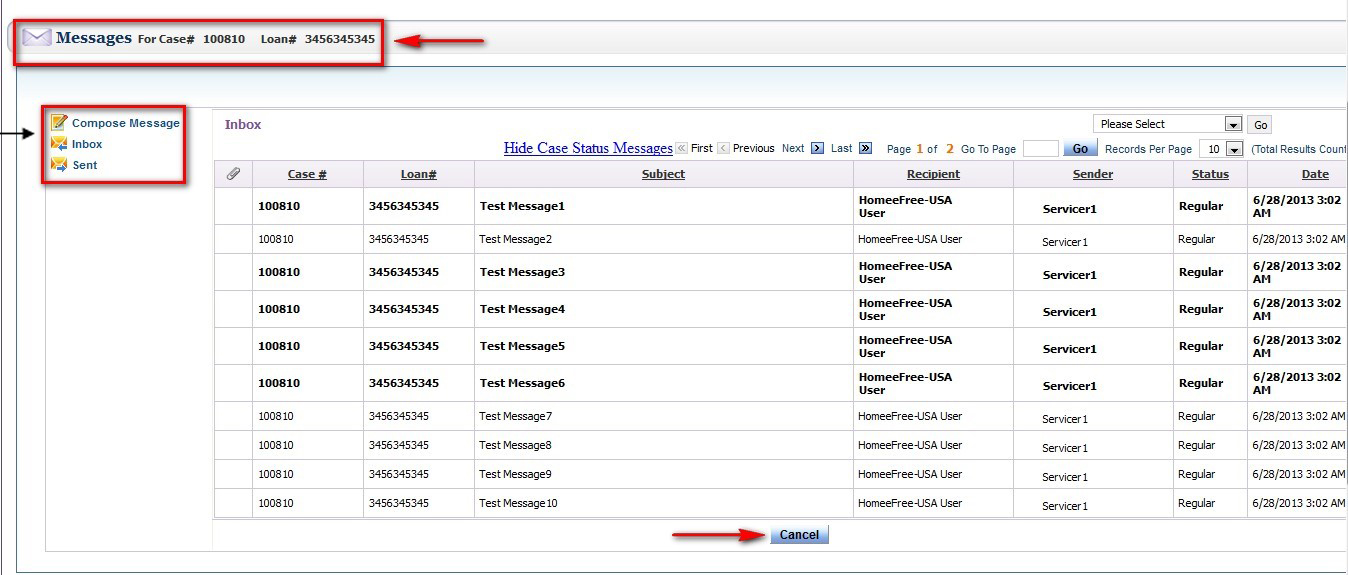
For messages to be successfully sent through the portal to the Client about the case, the Client's email needs to be current and valid, so there would be no need for the Counselor to use an outside source such as Outlook, Yahoo, Hotmail, or Gmail to communicate with their Client.
Compose a MessageTo send a message to the Client, the Counselor would first need to select Compose Message for the below screen to appear:
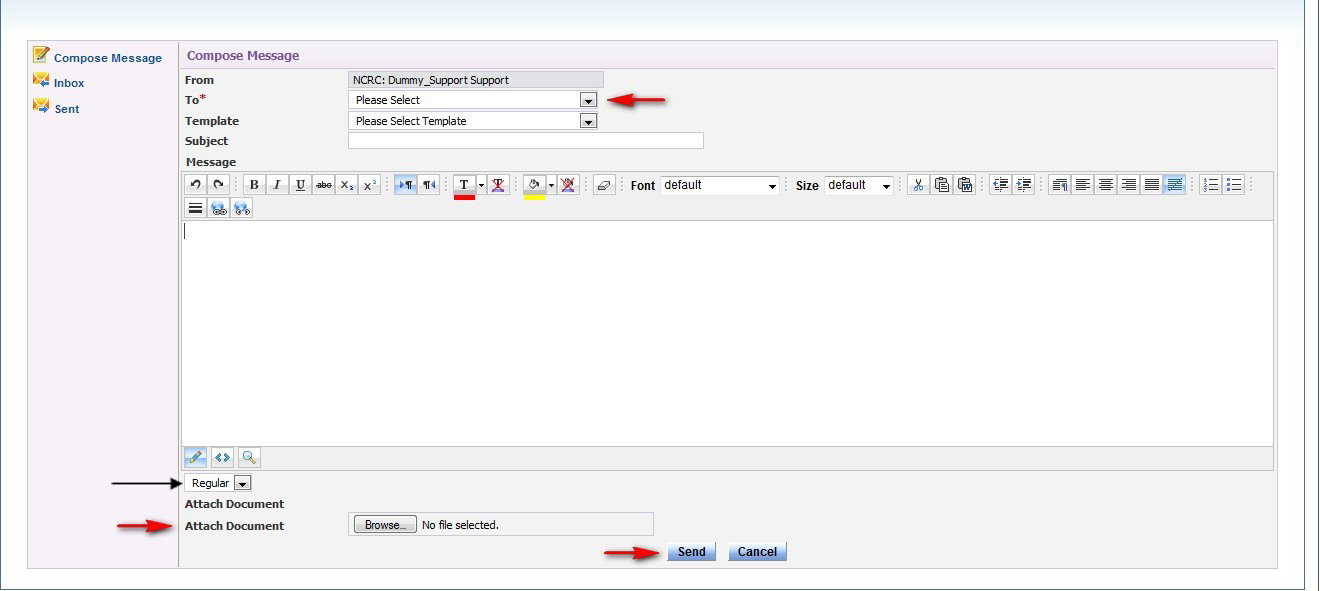
At this stage, the Counselor would need to select the person the message is being sent to from the To: drop down menu, select an email template (if one has been created) from the Template drop down menu, enter the Subject, enter the Message, select the importance of the message from the drop down menu (if any), and then click on the Send button.
If the Counselor selects an email template from the template drop down menu, then the subject and message would auto-populate.
Also the Counselor has the option to attach a document to the message if needed, before sending. However, if a document has been attached to the message, then a password would need to be provided to the Client, so the Client would be able to open and view the attachment once the email has been received. The password the Counselor provides in the message, would be the Client's DOB in the mm/dd/yy format, i.e. 102741.
Once the message has been successfully sent, the sent message could be seen in the sent box of the case.
Please Note:
***Only one document can be attached to the message***
***If more than one document needs to be attached, then the documents would first need to be
merged into one document and then attached to the message prior to sending***
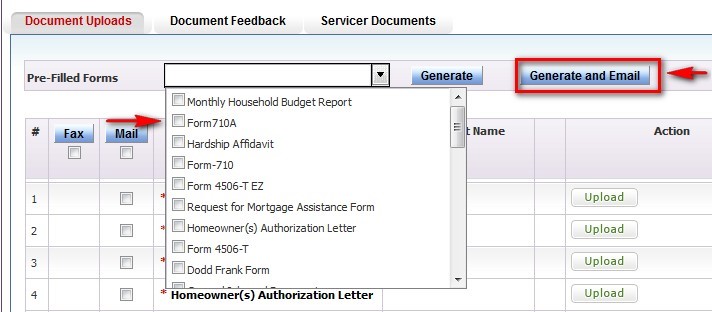
Generate and EmailAs the case is being worked on by the Counselor, there may be a situation in which certain documents may need to be sent to the Client from the portal, if information is still needed. For these specific forms to be sent to the Client, the Counselor would need to go to the Document Uploads screen of the case to generate and email the documents directly to the Client.
To email the documents to the Client, the Counselor would first need to select the documents from the pre-filled forms drop down menu as seen below and then click on the Generate and Email button.
When the Generate and Email button has been clicked, the system automatically creates a password based on the Client's DOB in mm/dd/yy format as seen in the below screen:
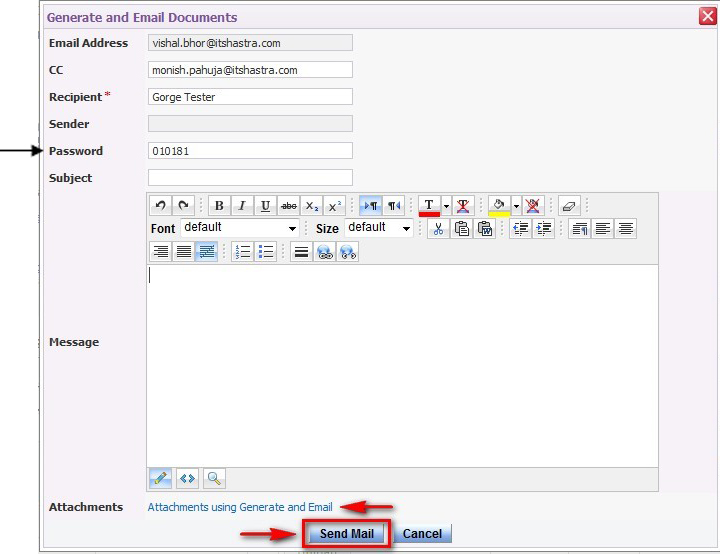
When documents have been attached, a link is provided instead of a list of the attached documents as seen in the above screen shot. Prior to the email being sent, the Counselor would have to include in the message the password as well as inform the Client to use the password to open and view the attached documents.
After the message has been sent, the Counselor would be able to check the sent box of the case, to see that the message was successfully sent to the Client.
Support Help
If you have any questions regarding this feature, contact the Support Team at support-premium@indisoft.us for assistance.


